Get Started
This guide will walk you through the essential steps to get started on our platform, from connecting your wallet and requesting an airdrop to adding a liquidity position, swapping tokens, claiming fees, and closing your position. If you encounter any issues, check out the more detailed User Guide. If you have any questions, feel free to join our community on Invariant's Discord for support. Please note that this walkthrough is on the testnet.
Connect your wallet
To begin using Invariant, you'll need to connect your wallet. Follow these steps:
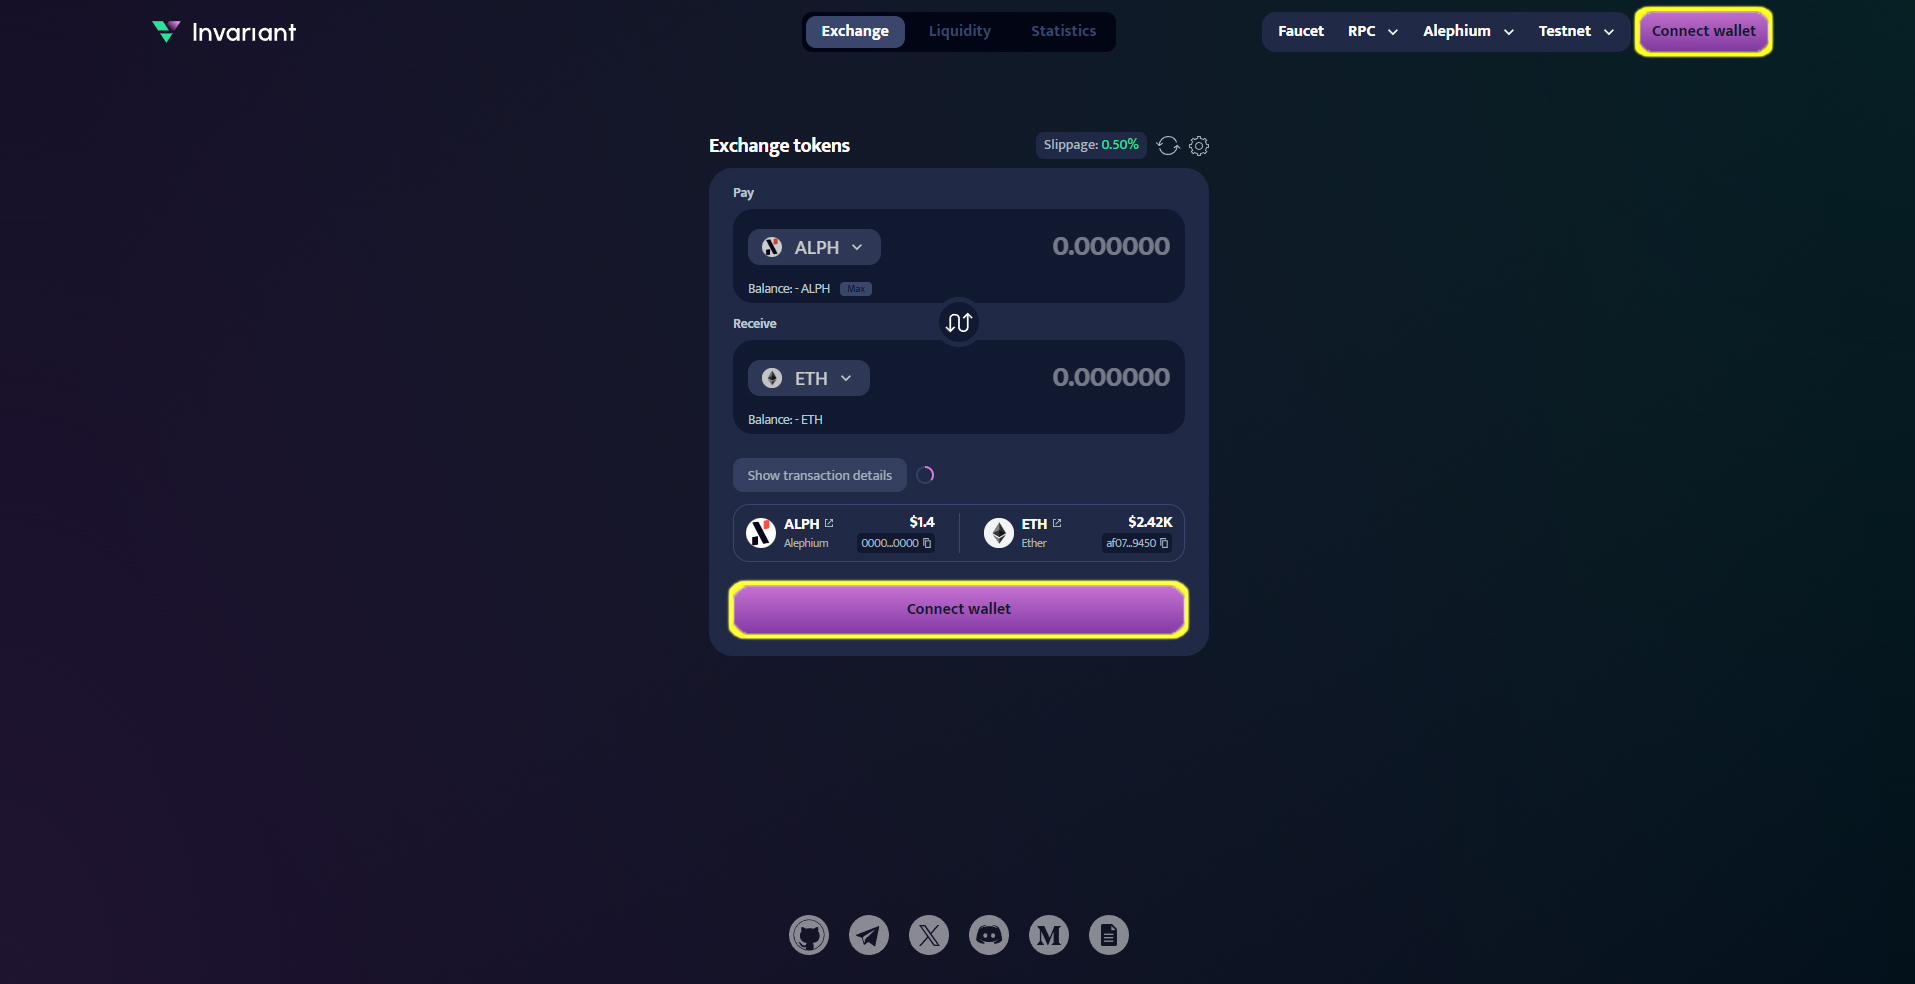
Click on the "Connect wallet" button at the top right corner of the page or or in the swap area.
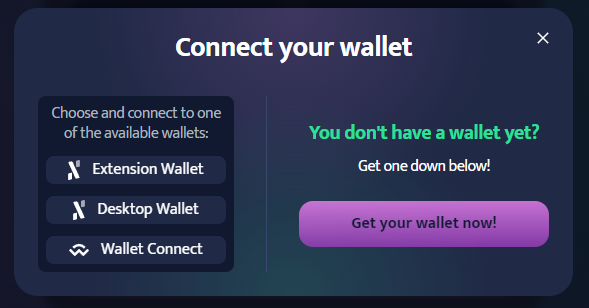
Upon clicking the "Connect Wallet" button, a modal will appear with several options:
- Extension Wallet - Clicking this option will connect to the wallet installed in your browser.
- Desktop Wallet - Clicking this option will connect you to a desktop wallet.
- Wallet Connect - Clicking this option will allow you to connect using WalletConnect, enabling you to link your mobile wallet by scanning a QR code or through a deep link.
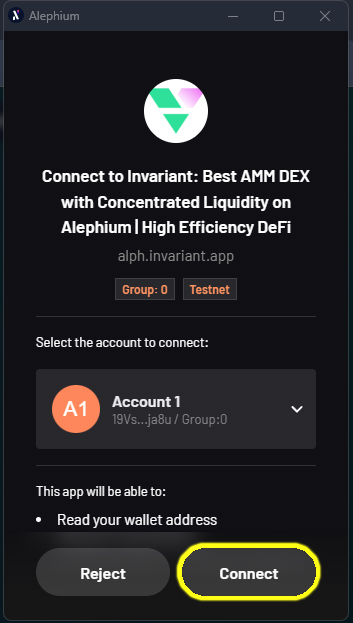
- Follow the prompts to authorize the connection, and you are ready to go with your wallet connected.
Request airdrop from Alephium Faucet
To start interacting with the Invariant platform on the Alephium testnet, you will need some testnet tokens. You can request these tokens from the Alephium Faucet.
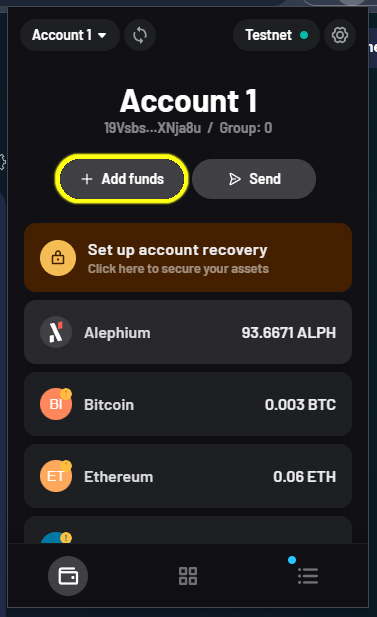
- Open your wallet and click "Add funds" button.
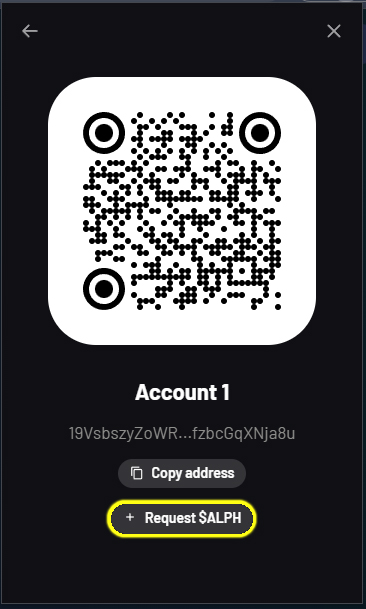
- Confirm by clicking "Request $ALPH" button.
- Your testnet ALPH tokens should appear in your wallet after couple seconds.
Alephium Desktop Wallet
The process for obtaining testnet ALPH tokens looks a bit different when using the Alephium Desktop Wallet. If you are using the desktop version, follow this guide.
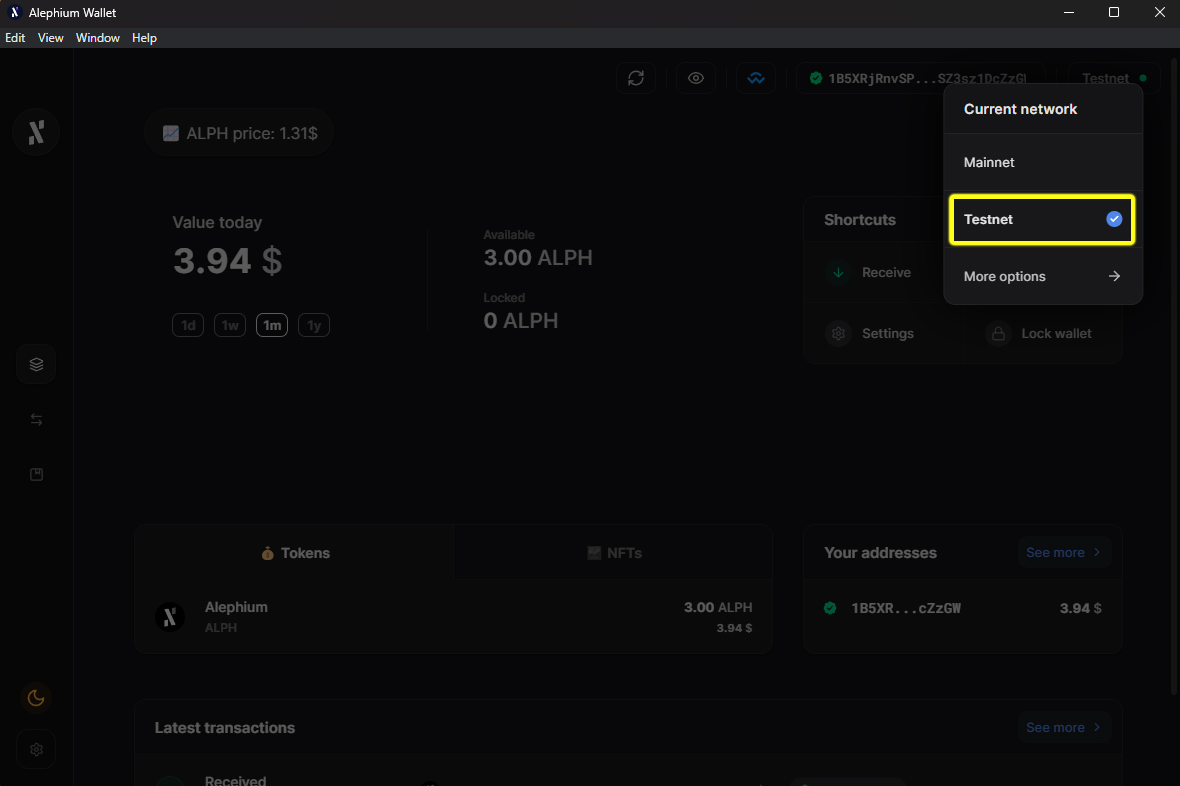
- Switch the network to the testnet.
It's important to switch the network to the testnet if you have the mainnet set as the default.
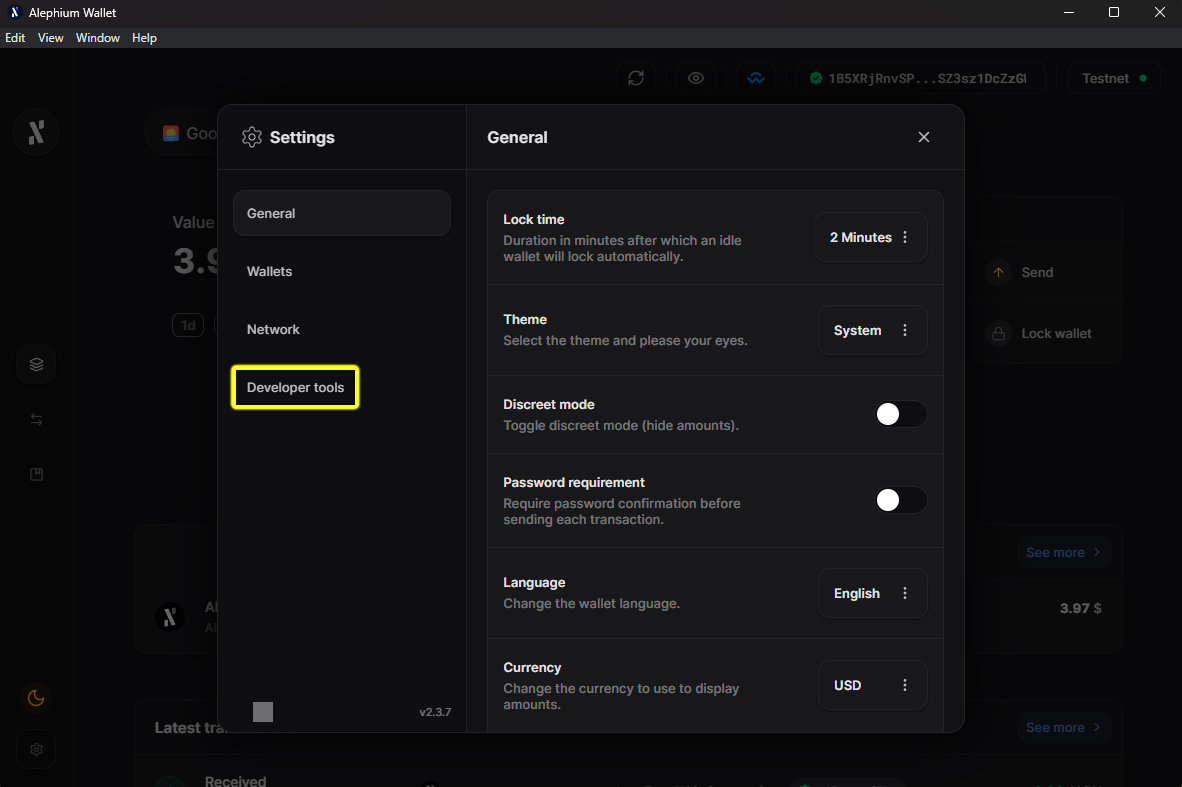
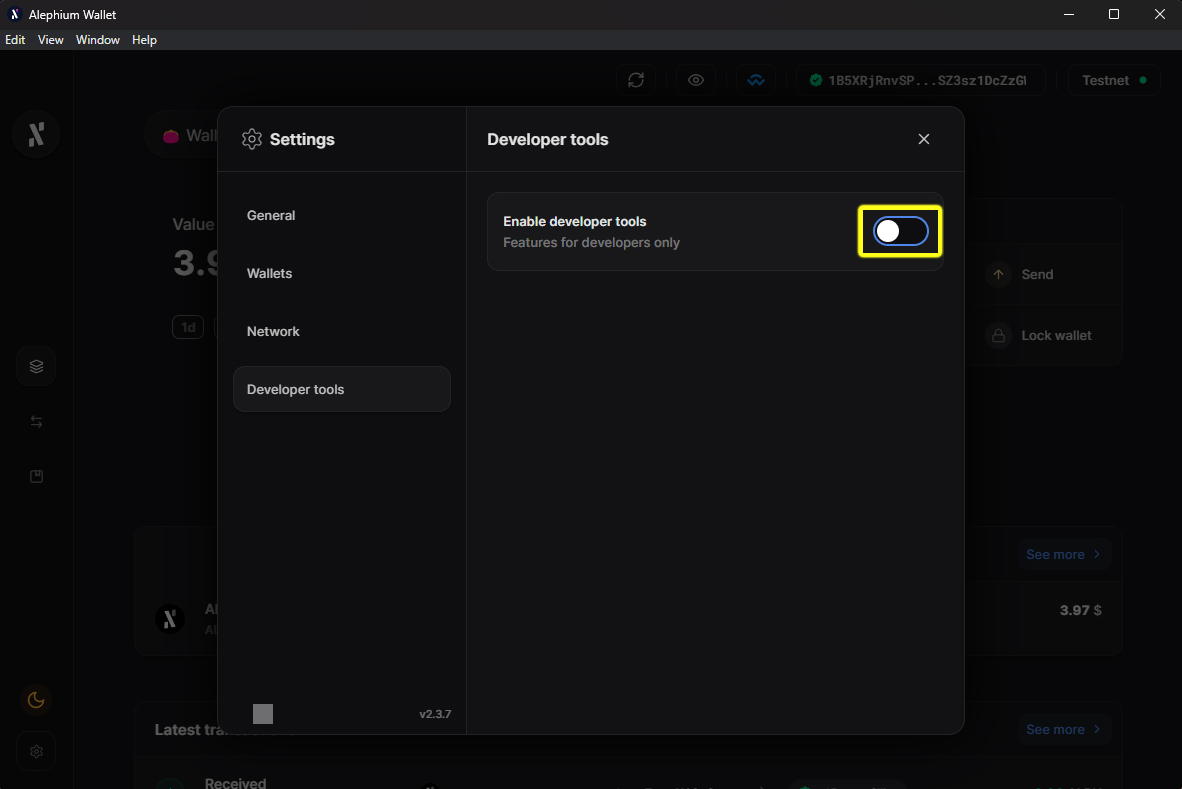
- Open user setting and go to the "Developer tools" tab.
- Switch "Enable developer tools" from off to on.
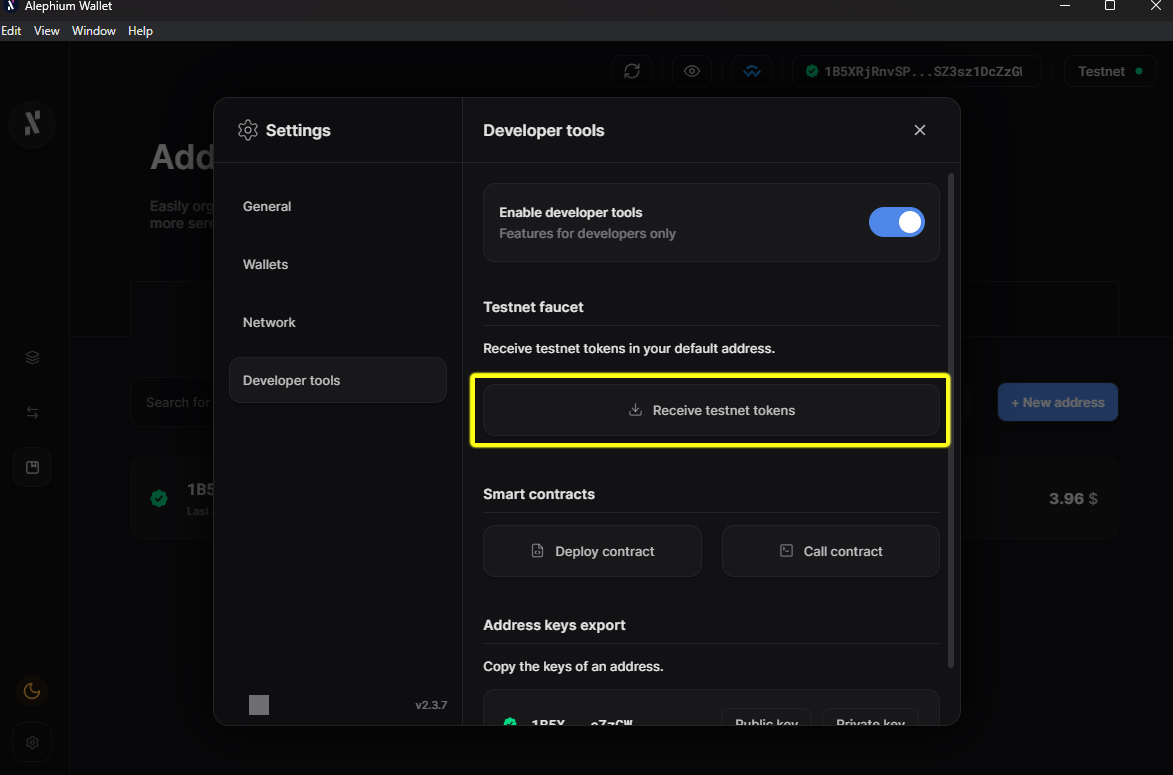
- Click the "Receive testnet tokens" button.
After enabling the developer tools, you should see several options on the screen, including "Receive testnet tokens." Click on this, and after a few seconds, your testnet ALPH will appear in your wallet.
Request airdrop from Invaraint Faucet
Now that you have testnet tokens to approve transactions on the Alephium Testnet, you can request an airdrop from Invariant. You will receive testnet BTC, ETH, and USDC.
- Click the "Faucet" button on Invariant site.

- Sign transaction in your wallet.
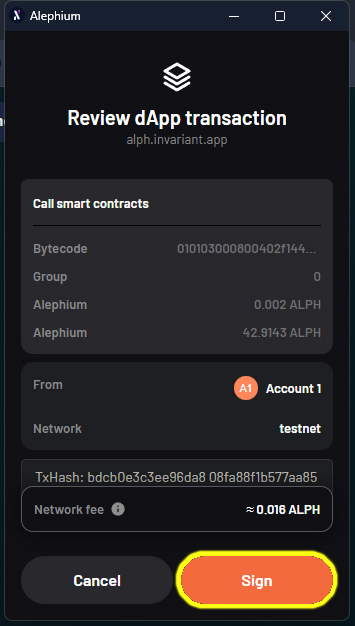
- After a while, you should have airdropped tokens in your wallet.
Add liquidity
Adding a liquidity position allows you to earn fees from trades on the Invariant DEX. To add a position follow these steps:
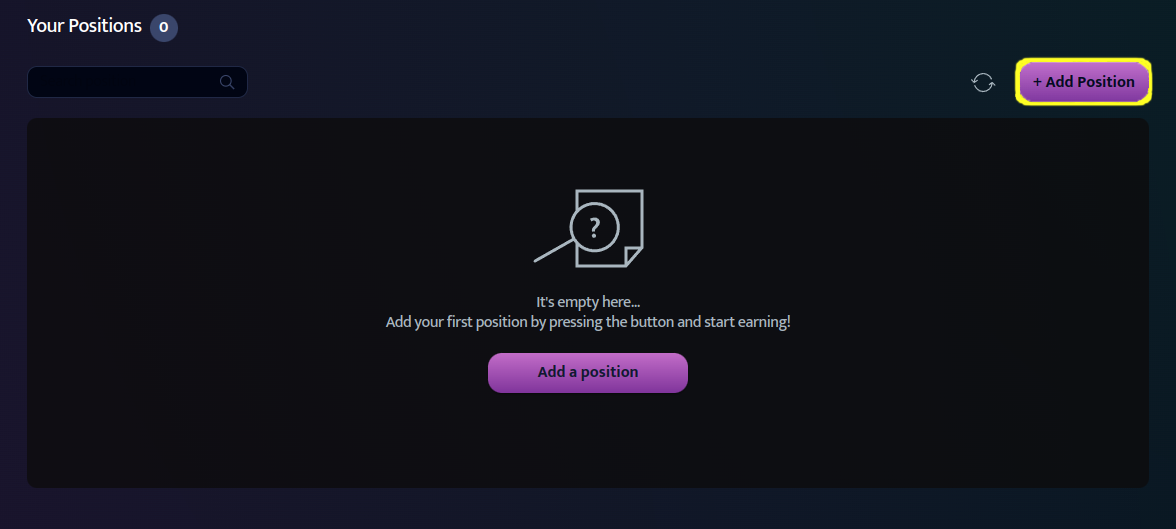
- Go to the "Liqudity" tab and click on "Add Position" button.
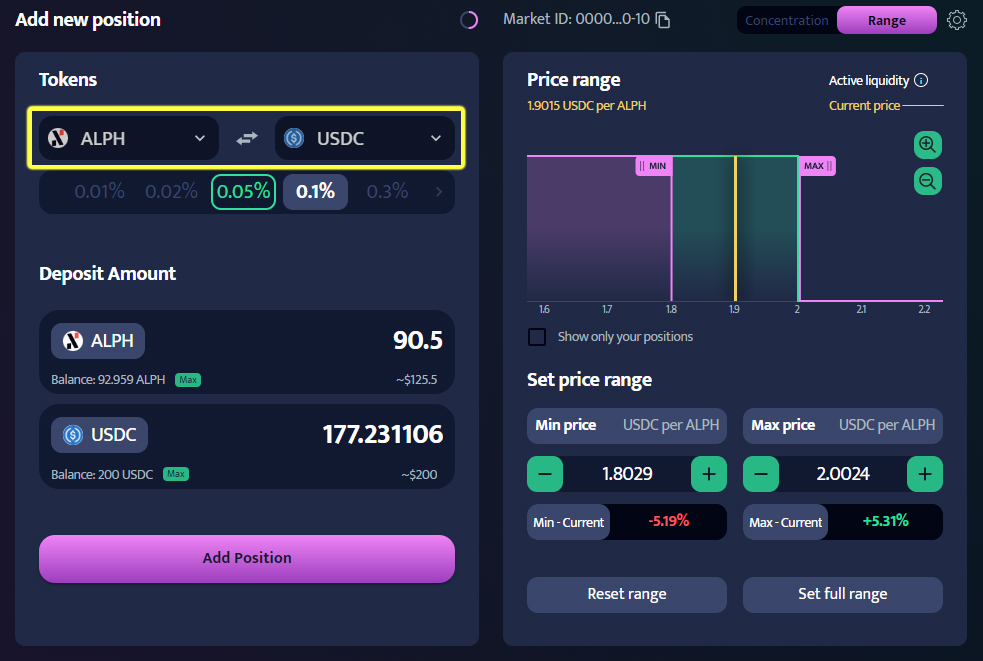
- Choose the tokens you want to provide liquidity for.
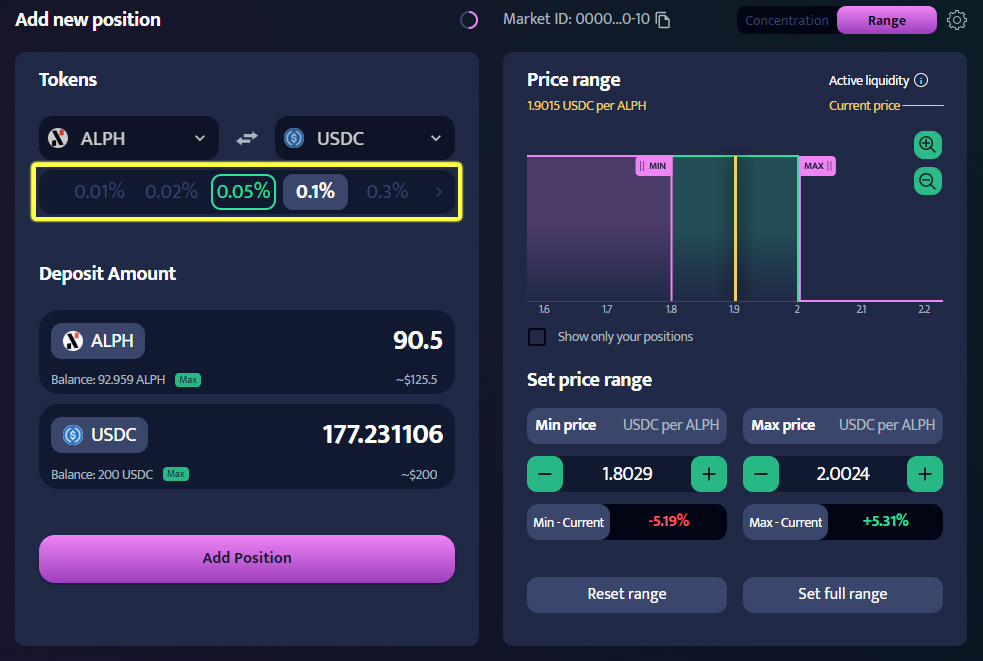
- Select fee tier. The fee tier determines the percentage of tokens deducted from a user who makes a swap, thus defining the amount of fees you will earn when a user utilizes your liquidity in the swap. Each fee tier represents a different liquidity pool.
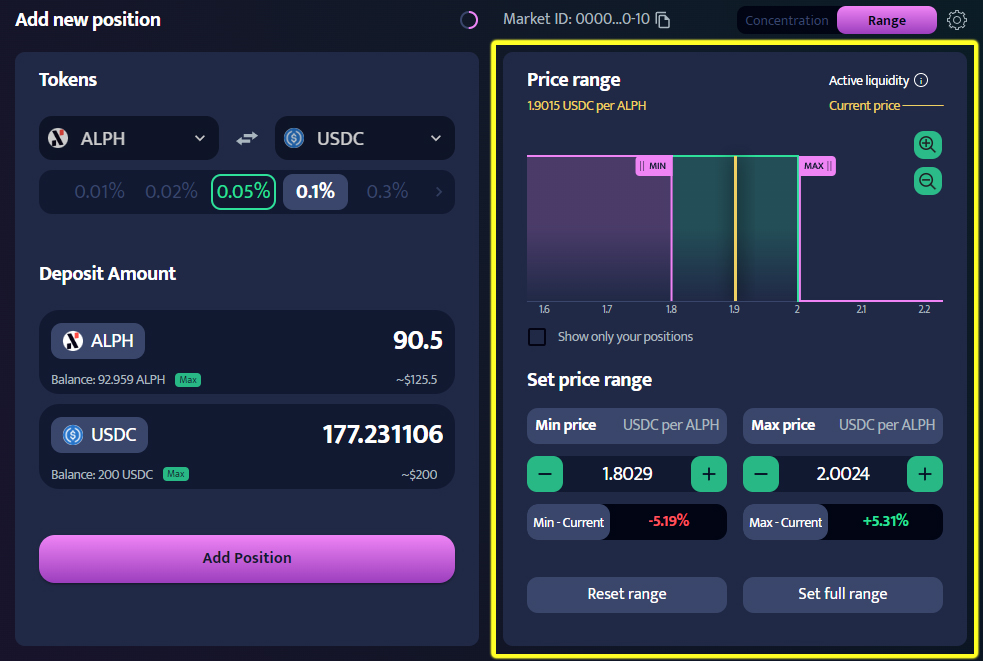
- Specify the price range within which you want to provide liquidity This range determines where your tokens will be active in the market. You will earn fees only when trades occur within this range. Adjust the min and max price sliders to set your range.
- Enter the amount you want to contribute to the liquidity pool. Please note that you need to provide both tokens in the correct ratio.
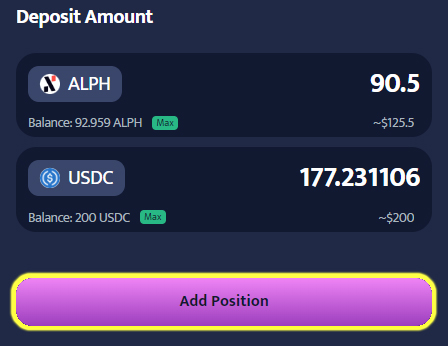
- Click "Add Position" button
Exchange tokens
Now you can use testnet tokens, that you received form Airdrop. This point will show you how to perform swap with this tokens.
Navigate to "Exchange tab".
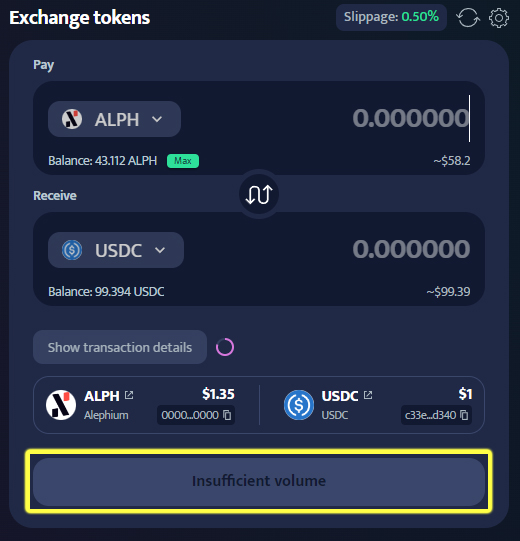
Select the tokens you wish to swap. A modal will appear where you can choose a specific token by either entering its name or selecting one from the list. Additionally, you can add a token by clicking the plus button and providing its token address. In this example, we're swapping from ALPH to USDC.
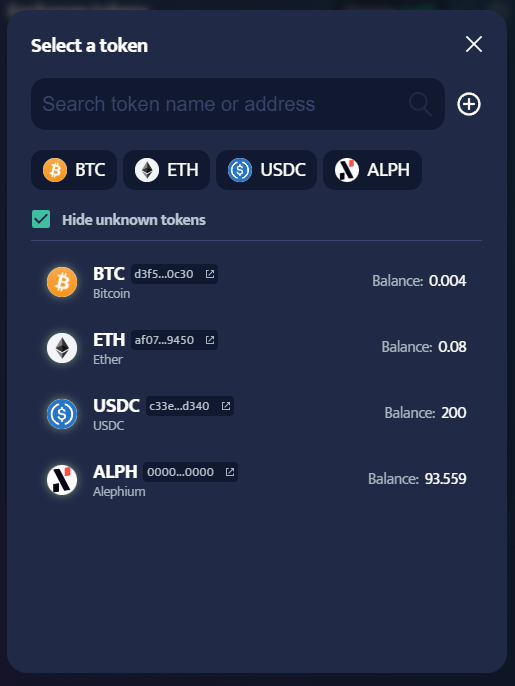
- Enter the amount of tokens you want to swap. To swap all tokens from your wallet, simply click “Max”.
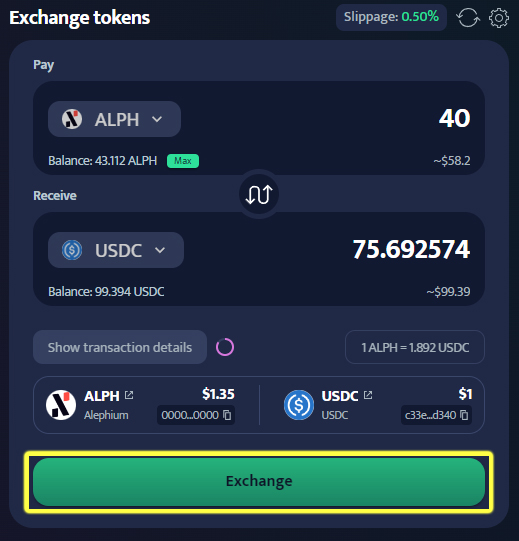
- Click "Exchange" and confirm the transaction in your wallet. Your swapped tokens will appear in your wallet once the transaction is completed.
Potential problems:
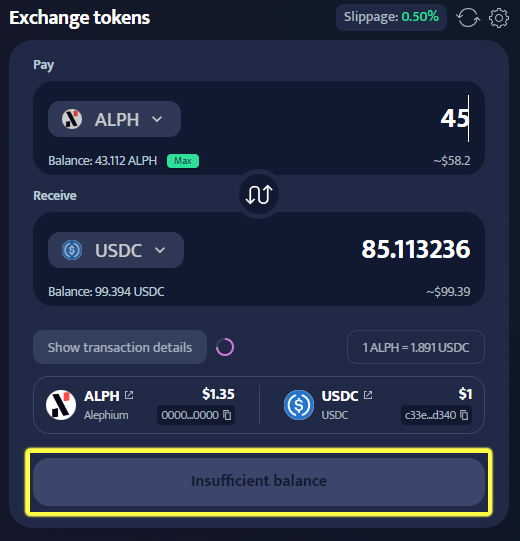
- Insufficient balance - this means that your balance is smaller than the amount of tokens you want to swap. To fix this, try swapping fewer tokens.
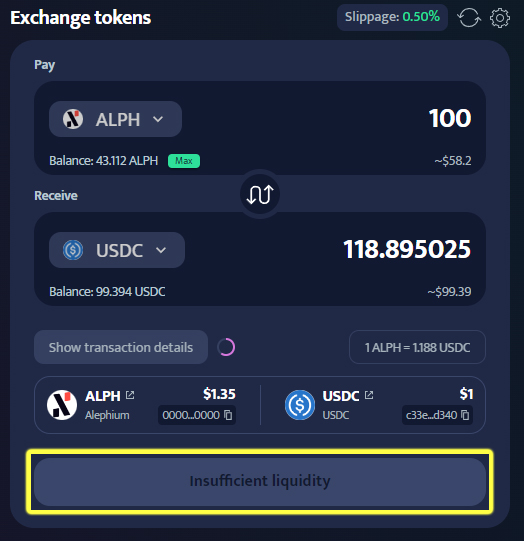
- Insufficient liquidity - this means that there is not enough liquidity in the pool to perform your swap. To fix this, add more liquidity or decrease the amount of tokens you want to swap.
- Insufficient volume - this means that you probably did not enter any tokens in the exchange window.
Claim fees
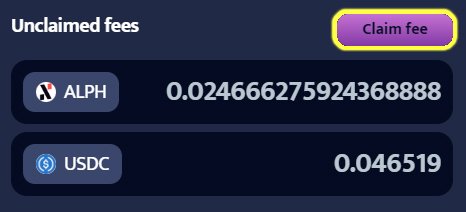
As a liquidity provider, you can claim your earned fees. To claim fees:
Navigate to the "Liquidity" section and open the position from which you want to claim fees.
Click on "Claim Fee" to initiate the transaction.
- Confirm the transaction in your wallet.
- Your claimed fees will be added to your wallet balance.
Close position
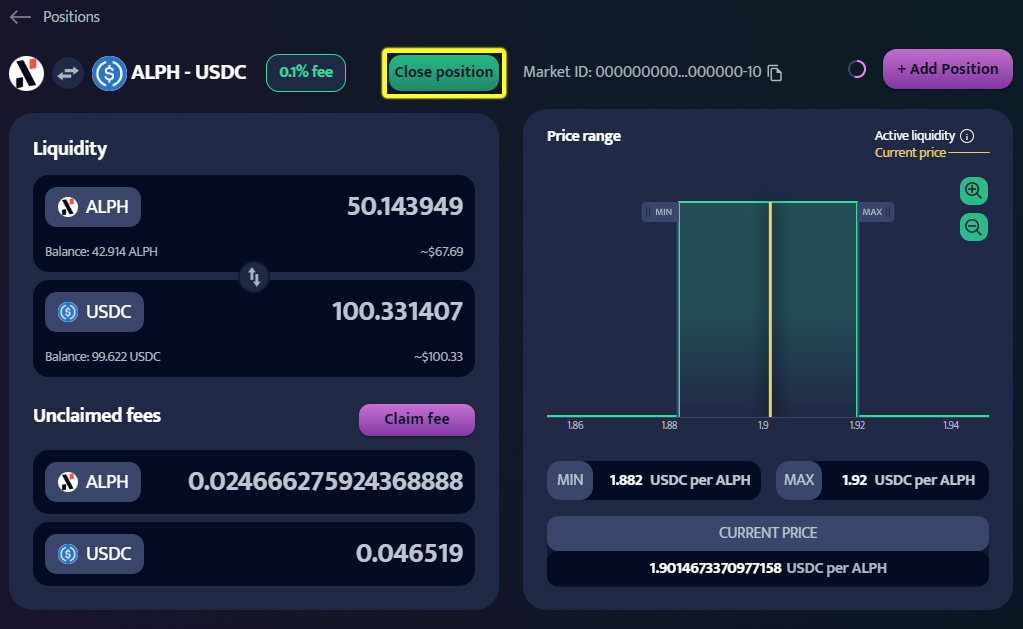
If you want to close your position and remove liquidity, you can do this even if your fees are unclaimed. The fees after closing the position will be sent to your wallet along with the liquidity.
Navigate to the "Liquidity" section and open the position which you want to close.
Click "Close Position" and confirm the transaction in your wallet. Deposited tokens as well as unclaimed fees will be transferred to your wallet
